Here’s an in-depth tutorial using 2 methods for how to add cute blushing cheeks on your plush faces!
Method one: Chalk pastels (or soft pastels)
This method is not permanent, and should not be used for plush that are going to be washed.
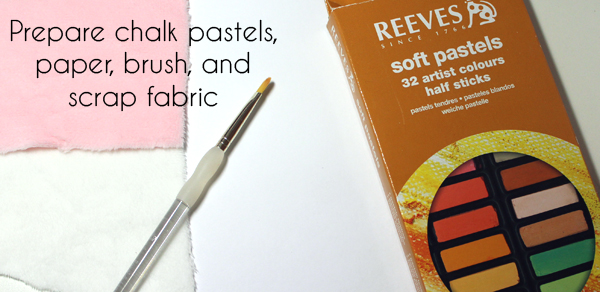
Step 1: Prepare materials
Chalk pastels/soft pastels (never use oil!), paper, brush, scrap fabric of the same color of your plush.
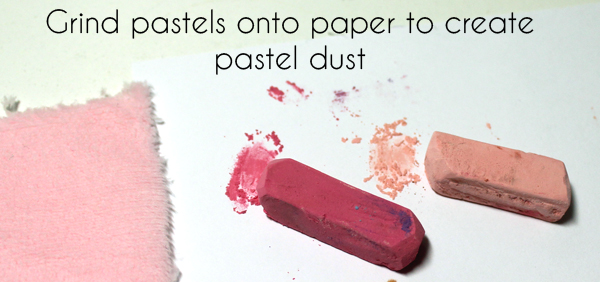
Step 2: Grind pastels for desired colors
If you don’t have enough colors, you can mix colors to create the desired shade. i.e. mix pink and orange for a peachy blush, or red and white for a pinky color. You should have one pile of chalk dust for each color that you will want to test.
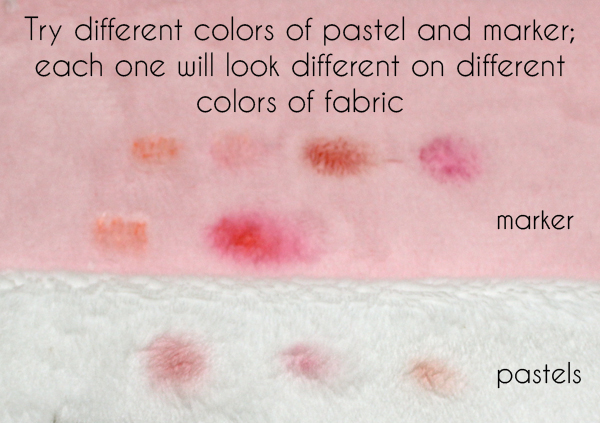
Step 3: Test the colors
Brush the chalk dust onto your test fabric. Make a new test circle for each color of chalk that you want to test. Make sure to keep track of which chalk color corresponds to which test circle.

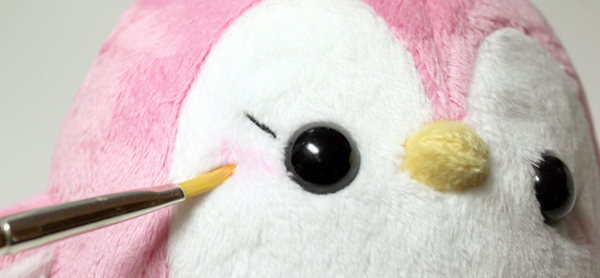
Step 4: Apply to plush
When you’ve practiced enough and found the right color that best matches the fabric type, apply the chalk pastels to the cheeks of your plushie.
Method two: Fabric marker
This method MAY be permanent; you can buy either washable/water-soluble fabric marker, or permanent fabric marker.
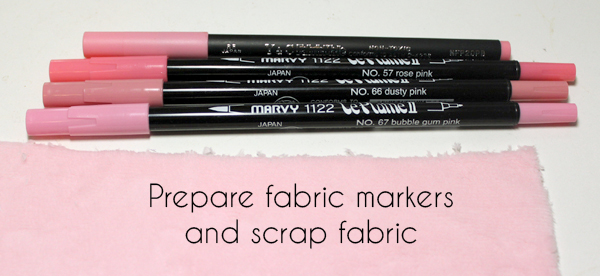
Step 1: Prepare materials
Fabric marker, scrap fabric, q-tip/cotton swab
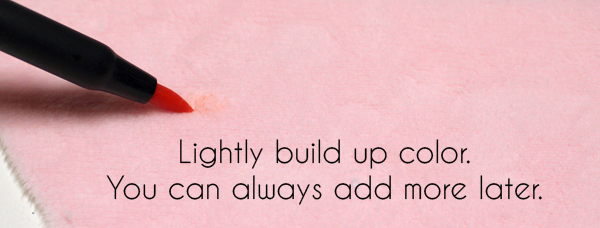
Step 2: Test the colors
Use fabric markers to make small, light circles on the surface of the fabric. Make sure to keep track of which color is which.
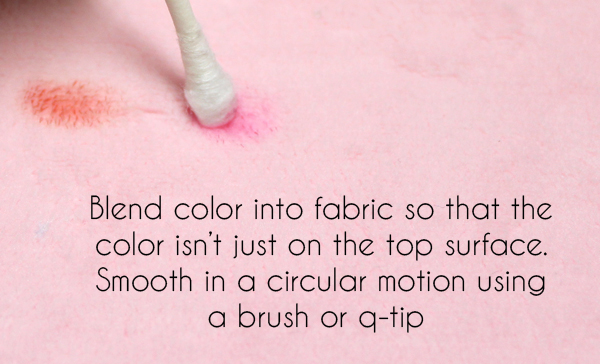
Step 3: Blend colors
Using a q-tip/cotton swab, blend the color down into the fabric using a circular motion.
Step 4: Apply to plush
When you’ve practiced enough and found the right color that best matches the fabric type, apply the marker to the cheeks of your plushie, and blend in with a cotton swab.
Final notes:
- Practice lots on test fabric first!
- Pastels are usually more expensive than fabric markers.
- Fabric markers can run dry; make sure they are not dry already when you buy them. Also store them properly (usually horizontally).
- Check if your fabric marker is washable with water before using.
- If your fabric marker is permanent, you may be able to heat-set with an iron; read the marker’s directions carefully.