Here’s a detailed guide on how to embroider on minky, step-by-step :)
1. Prepare your surface
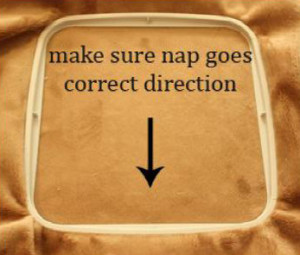
Have a clean, flat surface large enough to lay out your fabric. Make sure the fabric’s nap is going the direction that you want it to. Also check that wherever you will hoop, you will have enough fabric around the embroidery area to fit the whole pattern that will be needed for that piece. I like to embroider on the Right Side’s upper right corner on the piece of fabric, so any extra fabric doesn’t get in the way of my machine. (This is the upper left corner on the Wrong Side of the fabric).
2. Prepare stabilizer
Cut piece of stabilizer to a size about 1” larger than each size of the hoop. So for a 4”x4” hoop, cut a 6” by 6” square. If you’re not sure what kind of stabilizer you need, check my guide here!
3. Use adhesive spray

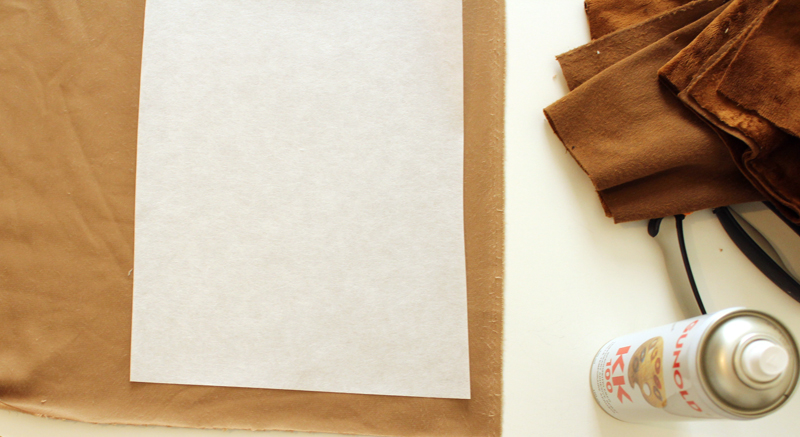
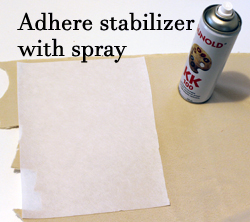
If you’re embroidering on a fabric that stretches, I recommend always adhering the back of minky to the stabilizer. You can do this with either a temporary embroidery spray, or fusible iron-on stabilizer. For minky I prefer spray, since ironing minky can sometimes result in melted fibers. I’ve used fusible no show mesh iron-on stabilizer and very careful ironing.
Bring the stabilizer outside and spray it, because it’s pretty much an aerosol glue, and not good for your furniture or your health. Hold the spray can about 12” away from the stabilizer. Lay the stabilizer down on the area of the fabric you will embroider, and carefully smooth it out.
4. Check hooping alignment

First, make sure your fabric’s nap is going the correct direction for your design. Then make double sure there’s enough room outside of the embroidery area to fit the entire pattern piece you will need to cut.
If your design’s alignment is important for a part of the fabric:
If you are embroidering using one of my patterns, the design will stitch pattern alignment stitches; so you won’t need to worry about if the face will be in the correct place.
Additional reading for alignment:
Aligning the center in hoopless embroidery
5. Hoop tension
Before you hoop your minky, check that the hoop tension is correct for the thickness of whatever you’re hooping. You should have the hoop as tight as possible to fit the fabrics in before hooping, without tightening the screw afterwards. This will prevent the fabric from being pulled or puckering. I leave my hoop at one tension, since I always hoop the same stabilizer and fabric.
So before you hoop the actual project, do a hooping practice run with the same kind of stabilizer and fabric.The hoop tension should not be so tight as to stretch fabric, and not be so loose as to cause sagging. You should be able to press the hoop in with some force.
6. Hoop minky fabric and stabilizer
Set your bottom hoop on a flat surface with plenty of room around it.
Place the top hoop on top of your fabric and stabilizer, carry these to the bottom hoop. Keep a firm grasp on the fabric and stabilizer. Align them as best you can to the bottom hoop, and slowly place the top hoop into the bottom hoop. Try to maintain a gentle firm hold on the fabric; don’t stretch it, and don’t let it sag.
When hooping the minky, try not to stretch the minky whatsoever when hooping. You shouldn’t have to stretch it to cover an air bubble that just formed; just try again and rehoop.
Check that fabric is properly hooped before embroidering. Improper hooping can ruin a design.
7. Toppings

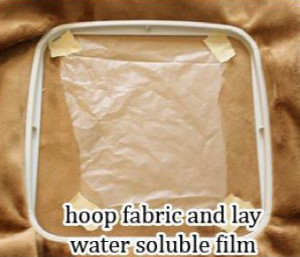
Use water soluble topping for embroidering on any fabric with ‘fur’ or ‘nap’. This prevents fur from coming up above the embroidery. Cut a piece of water soluble topping large enough to cover the embroidery area, smaller than the hoop size. Use a bit of masking tape on each corner to adhere it to the fabric.
Hoopless / Laying / Floating method
If you would like to:
- Embroider over fabric pieces too small to hoop
- Embroider over a sewn seam
- Embroider fabrics that get hoop burn (like velvet)
First hoop the stabilizer, then adhere the fabric to the stabilizer with embroidery adhesive spray. Use pins, tape, or a basting stitch to hold down the outer edges of the fabric to the stabilizer.
When you’re all hooped up, just turn on your machine, select your design, attach your hoop, and you’re good to go! Have fun! :)
