If you don’t have an embroidery machine, you can still make gorgeous eyes on your plush using the applique method on your sewing machine!
You can use this technique to easily add cute faces to your Cat Roll plush:
Materials needed:
Sewing machine, ballpoint/stretch needle, non-fraying fabric such as felt or suede (or use “fray check” on fraying/shredding fabric), tear-away interfacing (I like to use basket-style coffee filters), pins, washable marker or chalk, water-soluble stabilizer film topping (optional).
Step one: Cut fabric for the eyes, and pin each to face. Make sure the eyes are symmetrical by either checking in a mirror, measuring the distance from the outer eye edge to the outer edge of the fabric, or folding the face in half and making sure the eyes line up against each other directly. Pin the eyes to the face.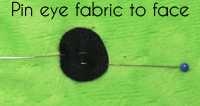
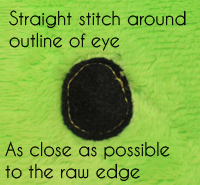
Step two: Using thread that matches the color of the eye, straight stitch around the outline of the eye. It should be as close to the edge as possible, around 1/8″ seam allowance or less.
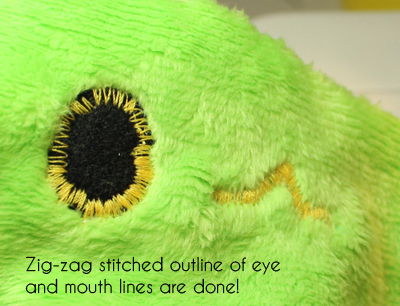
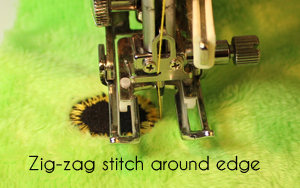
Step three (optional): A zig-zag stitch around the edge will give you a satin stitch embroidery outline look. It looks great on larger plush, but bulky on smaller plush.
Start with tear-away interfacing underneath the fabric in the area you will be sewing. Use test fabric and set your machine to a zig-zag stitch setting. For a clean look, especially if you are using minky or fake fur with fur pile, you can put water-soluble film on top of the plush fabric.
Your stitch width should be around 3mm, and the length of the stitches should be very short so that the stitches touch each other. Zig-zag stitch around the outer edge of the fabric. Repeat for both eyes.
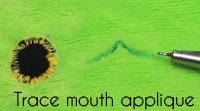
Step four: Use washable marker or chalk to trace a line where you want the mouth to be. Set your machine to a straight stitch, and sew over the mouth line. Then set your machine to a zig-zag stitch again, use the same settings for the eyes, stabilizer bottom and water soluble film top, and zig-zag over the center of the straight line you just sewed.
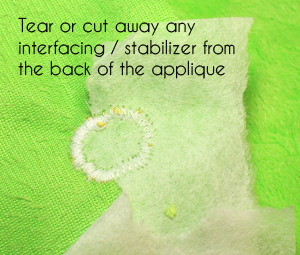
Step five: Tear away the backing from underneath the eyes and mouth. Clean up any threads.
And that’s it! You can practice this technique, and write down your machine’s zig-zag stitch settings, so you can keep using your favorite stitch widths and lengths.