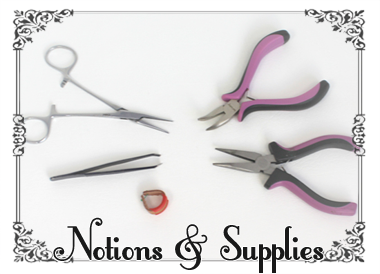
 There are tons of great tools out there to help make sewing faster and easier for you, but you don’t have to have all the tools below to make plushies. You can make and design plush with just scissors, thread, needle, pins, and fabric.
It’s a good idea to start out small in terms of financial investment, gain comfort and skill, and work your way up to a larger stash of sewing supplies.
Hand Sewing Needles – on Amazon
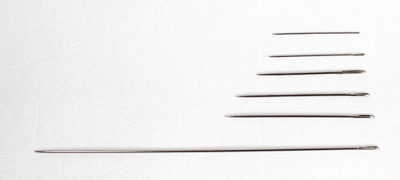
These may be marked as “embroidery” or “sharp” needles in your local fabric store. A variety pack is handy, as different thicknesses of needles will be needed for different types of fabric.
- For thin, fine fabrics, use a thin needle; for thicker, densely-woven fabrics, use a thicker needle.
- If your needle gets dull, damaged at the end, bent or rusted: toss it.
- A long ‘eye’ (the hole) of the needle is helpful to hold more strands of hand embroidery thread.
- A somewhat rounded point embroidery needle is easier to pass through wool felt than a sharp sewing needle.
- If you plan on doing any needle-sculpting, doll needles will be essential. You can get them anywhere from 3” long to 12” long. 6″ needles on Amazon! (I have a 12” needle, it feels like a weapon!)
Machine Needles
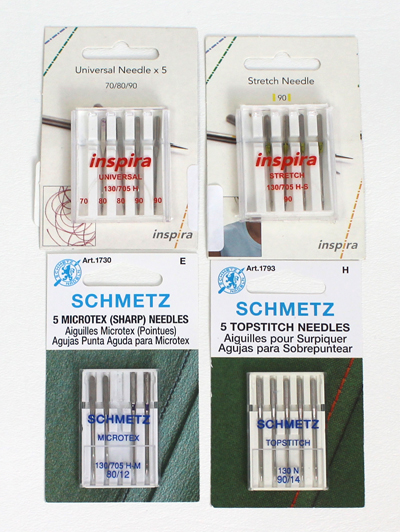
- My top pick for Minky: ballpoint or stretch 75/11 (on Amazon!)
- Choose the correct size and type of needle for the project you’re working on. Many machine sewing problems can be changed by using the proper needle. The number next to the needle is the diameter of the needle shank. The smaller the number, the smaller the needle size (for finer projects). If there are skipped stitches, use a larger number.
- Though a universal needle (Amazon) will work great, here are some other recommendations:
- Knits (minky, fleece, velboa) = ballpoint needle
- Velboa, suede = microtex/sharp needle
- Fake fur, mohair = heavy duty/leather/denim
- Felt = universal needle, medium weight
- Change your needle if it gets dull, damaged at the end, bent or rusted.
Thread

- Machine & Hand Sewing: All-purpose polyester sewing thread works great; I use Gutterman (on Amazon). You can use white thread for most projects – if your tension is correct, the thread won’t show :)
- Heavy Duty thread: Absolutely essential for areas that need extra strength on fursuits and plush.
- Machine Embroidery: Comes in rayon or polyester, high-sheen thread used for embroidery machines. Use embroidery thread in bottom bobbins.
- Hand Embroidery: I highly recommend DMC Embroidery floss for felt plushies. It’s strong and has a lustrous sheen, which makes it easier to sew with than cheap embroidery floss.
- Tangled twisty threads? Use a thread conditioner! Beeswax is a cheap option, but if you’re worried about allergies, there are synthetic options as well.
- Discard very old thread, as it breaks easily and can fray in your machine.
- Don’t purchase very cheap thread, as it is not made as well and can come apart more easily.
Cutting tools
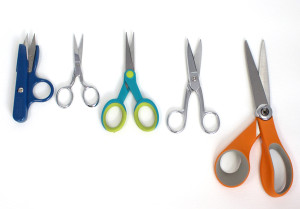
- Label your scissors and keep each pair for its’ separate use:
-
- Ergonomic Fabric scissors (Dressmaker shears: This should be your best pair; sharp, and kept in good condition. I highly recommend ergonomic or comfort types of scissors if you can find them.)
- Snipping thread (Embroidery scissors: small and sharp)
- Tape and gunky materials (Cheap scissors)
- Cutting paper (Paper dulls the blades faster than fabric does)
- Faux fur or mohair (Tough shears, keep these separate from your fabric cutting scissors if you use these materials with tough backings)
- To label scissors: I just use sharpie to write on the handles “F” for fabric, “T” for thread and “P” for paper. You can use masking tape and sharpie if you don’t want to write on the handles.
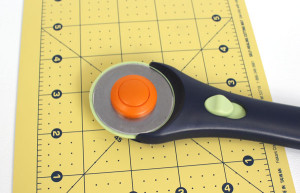
- A rotary cutter (and cutting mat) is handy for slippery fabrics such as minky.
Pins
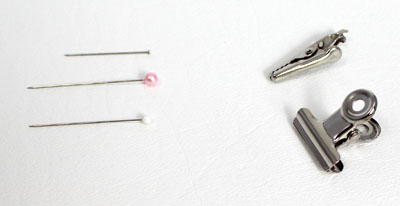
- Quilting pins are perfect for delicate or knit fabrics, as they’re thin and won’t leave holes in your project.
- Be careful not to iron over plastic-headed pins, as they will melt.
- For thick tough fabrics such as mohair and fake fur, you can use clips (I love mini alligator clips).
- If your pins get dull, damaged at the end, bent or rusted: toss them.
Marking tools
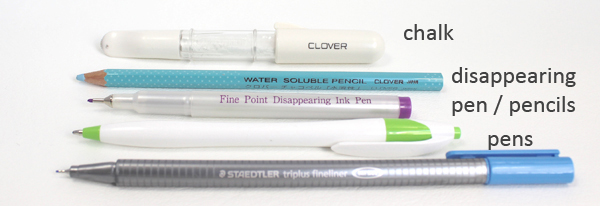
- Chalk: Works well for felt, minky, and dark fabrics. Regular sidewalk chalk is a bargain, and still removable. I use a chalk powder roller because it creates a fine line with precision, and presses the chalk down into the fabric.
- Washable/temporary pen: Works well on fleece, minky, velboa, faux fur. Doesn’t work so well on felt.
- Ballpoint pen: Works well on fleece, minky, velboa, faux fur. Not great for felt plushies
Stuffing
- Polyester polyfil is the filling of choice for stuffed animals. It’s easily found at fabric/craft stores, is cuddly soft, and affordable.
- Excelsior, Bamboo, Wool and other fillings are either more traditional or eco-friendly.
Interfacing (for machine sewing)
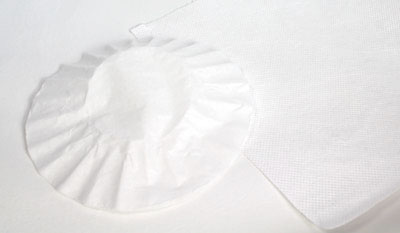
- Some knits and thin fabrics will sew more easily on your machine with a lightweight tear-away interfacing underneath. This way, the feed dogs have something to grab onto, and the needle won’t press your fabric down into the bobbin area.
- You can buy interfacing at the fabric store, or instead use tracing paper, marker paper, or basket-style coffee filters. I’ve had good results using strips of coffee filter underneath my projects, it’s cheaper than buying by-the-yard interfacing.
- Use iron-on for applique details (such as eyes), or for stiffening a fabric.
Seam ripper
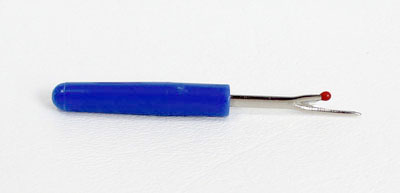
- Someone’s grandmother once said that a good sewer is a good seam ripper. I entirely agree; if you’re not happy with the quality of your sewing when you’re making it, you will be even more unhappy with your finished project. Always have a basic seam ripper in your sewing kit.
- When your seam ripper becomes difficult to use, either get it sharpened or buy another. A sharp seam ripper makes a world of difference!
Ruler

- I recommend a clear ruler you can see through, so you can easily add or change seam allowance.
Pin cushion
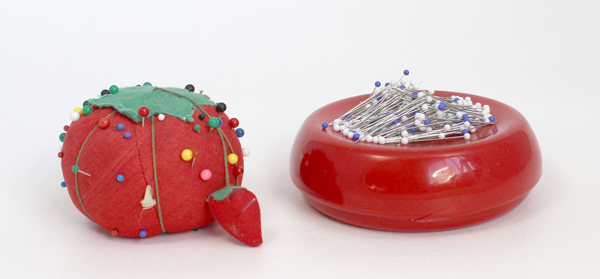
- I highly recommend a magnetic pincushion for pins; just make sure to keep it away from your computer and other electronics.
- Use a separate pin cushion for your hand sewing needles; you won’t want to dig through 250 pins trying to find 1 needle. The wool roving inside of the pin cushion will keep your pins from rusting.
- If your pincushion came with a strawberry filled with sand, you can use that to clean your needles. Just make sure to only put fine needles in there; if you puncture a hole in it with a thick needle, sand goes everywhere!
Weighting materials
- Polyester pellets are commonly found at craft stores. These are great for beanies or just adding a little extra weight at the bottom of a plush, or in the hands & feet.
- Stainless steel shot and glass beads are heavier and more pricey, and are great for smaller plush and teddy bears.
- Don’t use beans or other water-absorbent materials. These can rot inside your plush.
- Place weighted materials in a cloth(tulle/mesh) bag so that they aren’t loose inside of the plush.
Paper
- Plain printer paper works great for printing and editing patterns.
- Reuse and recycle by using both sides of the paper.
- Thick paper or light cardboard is best for patterns that get used very frequently.
Awl
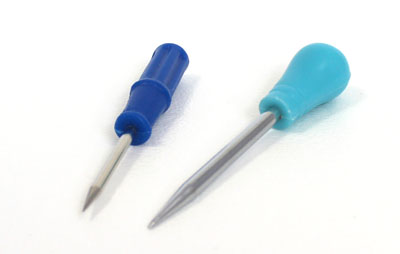
- These are used to create holes for eyes or joints, without ripping the threads of the fabric.
- If your awl is not large enough for the hole you need to make, make 4 small snips around the hole, to make a crosshair-like pattern. Seal with fray check once you’ve made sure the hole is large enough.
Hand Protection
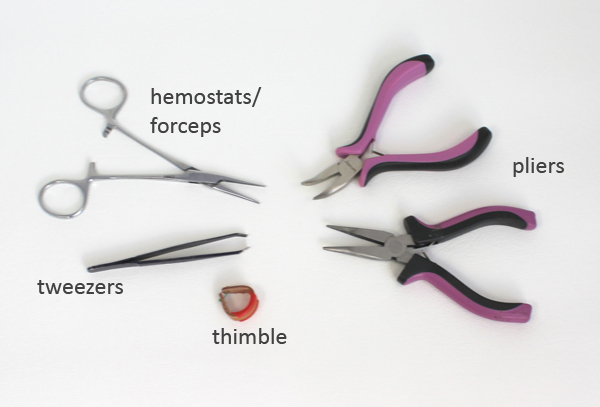
- Pliers to help pull needles through stubborn fabric.
- A thimble or leather thimble is handy for hand sewing tough fabrics.
- Hemostat/forceps – Used for turning small limbs and inserting stuffing.
Thread Heaven (or Beeswax)
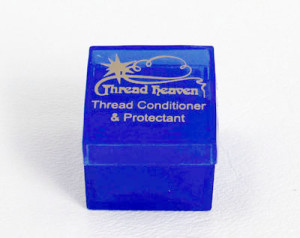
- Using a thread conditioner makes hand sewing much easier; your thread will not tangle or knot on its’ own, and you’ll be able to sew more quickly.
- To use, place one end of your thread over the top of the conditioner, press down it down with one finger as you pull the thread through. You may have to repeat this 2 or 3 times.
- Do not use beeswax for plush recipients that could be allergic to bees, beeswax or honey.
